Tampilkan postingan dengan label things. Tampilkan semua postingan

Sabtu, 26 November 2016

Getting on with things

Boat building has stalled in the last few weeks as I realize that the raising of each frame will bring the project one step closer to completion or calamity. At this point, Im not sure which it is going to be and am thus reveling in a rather blissful ignorance. When the frames do go up next week (!), I will know once and for all whether Luna will be a beauty or a god-awful mess. The quality of the lofting job I did over a year ago will be put to the test when I can use a batten to check the three-dimensional curvature of the chine and sheer.

The last couple of days have seen me drinking a lot of wine, eating a lot of tamales, avoiding the boat shop,and over-analyzing each step Ive taken to get to this point. For each part of the project there were setbacks and things that didnt turn out quite like Id imagined (these lessons have been mentally filed under "The Next Boat"). After spending a lot of time before each new step thinking about what could go wrong, I realized that the sooner I could deal with what went wrong, the better. Id stall before each new venture (just as Im stalling now), think about various outcomes and contingencies, and ultimately had to decide to just do it. Just take a chainsaw to that keel piece you spent a week in the hot sun laminating. Just run a Skillsaw down the side of  keel. Just buy that planking even if you arent sure itll wrap around the hull. Just use that adhesive even if its not proven. Just glue this piece on that piece and bolt it to this piece.

Just build the boat.


Read More..

Jumat, 04 November 2016

Some Tips and Things Leaned along the way


Raising the bar: So far Ive been happy that I raised the form that the boat frames mount to. The plan says 24" off the floor, but I raised it to 32". With this small boat, I have not found it to be too high. The working level for the sides was good as I could sit on a stool for much of the work and it kept me off my knees. It is easy to get underneath the boat for various checks and bottom installation.


Recycled Ping-Pong Table: This has been a could base for mounting the forms while covering the carpet. Surrounded by 1/4" plywood, it does not move around and is a stable platform. If I had it to do over, I would add a 2x4 reinforcement from side to side directly underneath the form feet. It rocks slightly when pushed from the side as I only have a 2x4 reinforcement down the middle of the tables underneath where the 2x6 mounts down the middle. With the carpet and padding underneath the protective plywood, it flexes a bit underneath my feet and is very comfortable to stand on, unlike cement floors.


Gum Containers: I looked at an empty Eclipse gum container and being a pack rat it looked too good to throw out. So I asked myself, "Self, What could you use this for?" And the self answered, "Screws". They are terrific. The top unscrews for loading, the clear top allows seeing whats inside, it opens as a shaker spout for or the clear top pops open. Way cool. Im chewing alot of gum now trying to get enough containers for all the different screw sizes. Maybe they should advertise that!


Screw Lube: Sometimes screwing goes better with a little lube...get your mind back on track, were talking boats here. After breaking a couple of the silicon-brass screws, I started putting a small amount of "Screw-lube" on the tip and the problem went away.


Dry Wall Screws: I used these screws for the temporary screw blocks and while they may be cheap and drive home easily, but they also sometimes break when removed. I didnt learn my lesson and kept using them, and had another three break off when removing the screw blocks on the second front bottom piece.
Broken Screw Removal: When the cheap drywall screws are broken off at the surface with nothing to put a vice grip on, what do you do? They have to come out or they would rust later. After digging through my shop, I found a roll pin with an I.D. about the screw shaft diameter. I filed a short spiral so it would cut the wood around the screw shaft when rotated counter-clockwise. I chucked it up and started pushing and boring around the screw shaft. It would smoke and act like it wasnt going to work until with a bit more brute force it would grab the screw and out it would come. Drilling clockwise into scrap wood would remove the screw shaft so I could reuse it. I used it more than I would have liked.
Read More..

Selasa, 06 September 2016

Other Things Ive Been Doing In The Background

If you read back over the blog you will see several "more on that later" type comments recently.

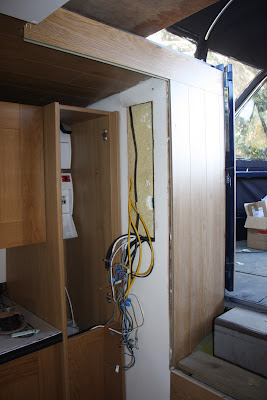
The first of these is the instrument panel.  This is how it looked first off.


I really wasnt happy with this so I set about improving it.  First to do was remove all the instruments and to cut out a hole without cutting through any wires.


Then a new mounting board made from a composite board with a brushed stainless finish.


After which a 6mm packing frame was attached to give some recess to the panel, which was then refitted behind the hole and a nice recess oak frame made to dress it. 


I think this looks a whole lot better.  It is now IMO part of the decor not just a bunch of instruments stuck on a board.

I have also finished the hatch, well almost.  It still needs a tiny bit of paint on the inside.  First it was insulated with Celotex then clad out with the same floor laminate as I have used for the rest of the boat roof.


I have also finished the rear door and trimmed them with oak and polished with Briwax.  Again I have used floor laminate to complete the entrance decor.


All the parts needed for the bed base are now on order.  The company that made the furniture will also make finished panels to any reasonable size and finish them as required.  The bed will be a lift up one. 

Also the kitchen is pretty much finished.  I still need the breakfast bar made but my brother is rammed with work ATM because everyone wants their granite worktops done now before Christmas.  When I have time I will clear down the kitchen and photograph it.
Read More..
 
Wooden Boat Plans - Powered By Blogger